
Automate the Boring Stuff with GPT-4 and Python
Speed up your daily workflows by getting AI to write Python code in seconds.

Image by Editor
On March 14, 2023, OpenAI launched GPT-4, the newest and most powerful version of their language model.
Within just hours of its launch, GPT-4 stunned people by turning a hand-drawn sketch into a functional website, passing the bar exam, and generating accurate summaries of Wikipedia articles.
It also outperforms its predecessor, GPT-3.5, in solving math problems and answering questions based on logic and reasoning.
ChatGPT, the chatbot which was built on top of GPT-3.5 and released to the public, was notorious for “hallucinating.” It would generate responses that were seemingly correct and would defend its answers with “facts”, although they were laden with errors.
One user took to Twitter after the model insisted that elephant eggs were the largest of all land animals:
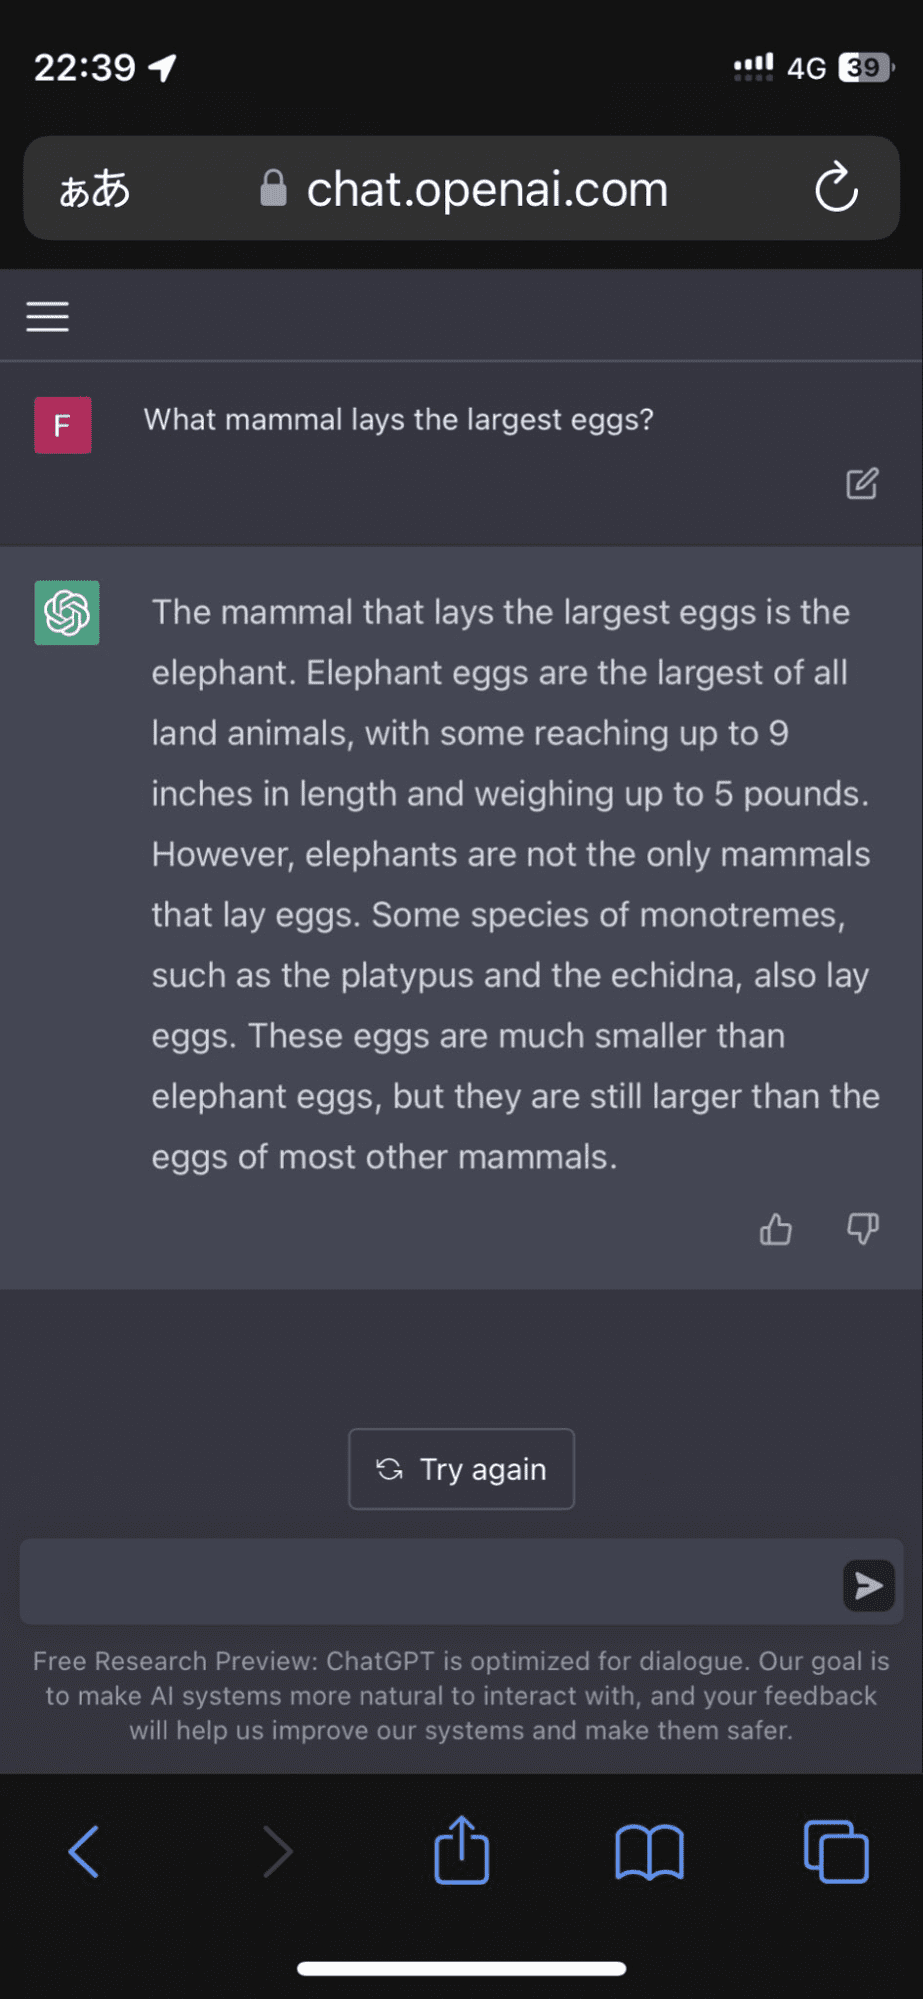
Image from FioraAeterna
And it didn’t stop there. The algorithm went on to corroborate its response with made-up facts that almost had me convinced for a moment.
GPT-4, on the other hand, was trained to “hallucinate” less often. OpenAI’s latest model is harder to trick and does not confidently generate falsehoods as frequently.
Why Automate Workflows with GPT-4?
As a data scientist, my job requires me to find relevant data sources, preprocess large datasets, and build highly accurate machine learning models that drive business value.
I spend a huge portion of my day extracting data from different file formats and consolidating it in one place.
After ChatGPT was first launched in November 2022, I looked to the chatbot for some guidance with my daily workflows. I used the tool to save the amount of time spent on menial work - so that I could focus on coming up with new ideas and creating better models instead.
Once GPT-4 was released, I was curious about whether it would make a difference in the work I was doing. Were there any significant benefits to using GPT-4 over its predecessors? Would it help me save more time than I already was with GPT-3.5?
In this article, I will show you how I use ChatGPT to automate data science workflows.
I will create the same prompts and feed them into both GPT-4 and GPT-3.5, to see if the former indeed does perform better and result in more time savings.
How to Access ChatGPT?
If you’d like to follow along with everything I do in this article, you need to have access to GPT-4 and GPT-3.5.
GPT-3.5
GPT-3.5 is publicly available on OpenAI’s website. Simply navigate to https://chat.openai.com/auth/login, fill out the required details, and you will have access to the language model:
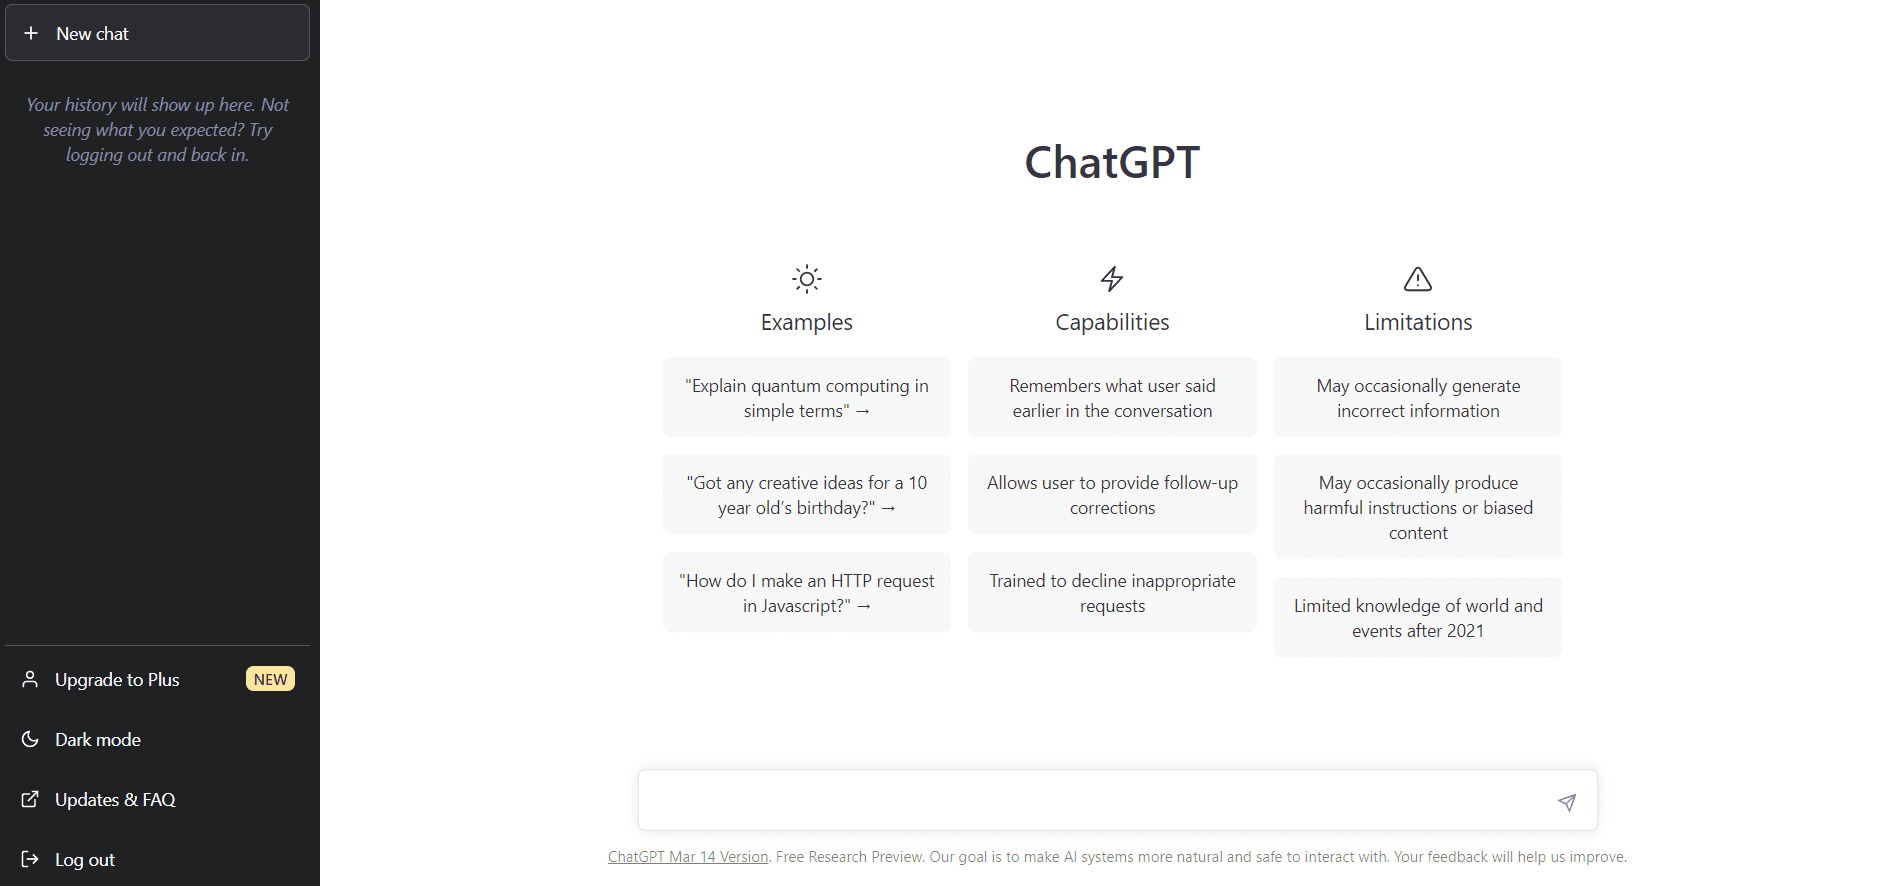
Image from ChatGPT
GPT-4
GPT-4, on the other hand, is currently hidden behind a paywall. To access the model, you need to upgrade to ChatGPTPlus by clicking on “Upgrade to Plus.”
There is a monthly subscription fee of $20/month that can be canceled anytime:
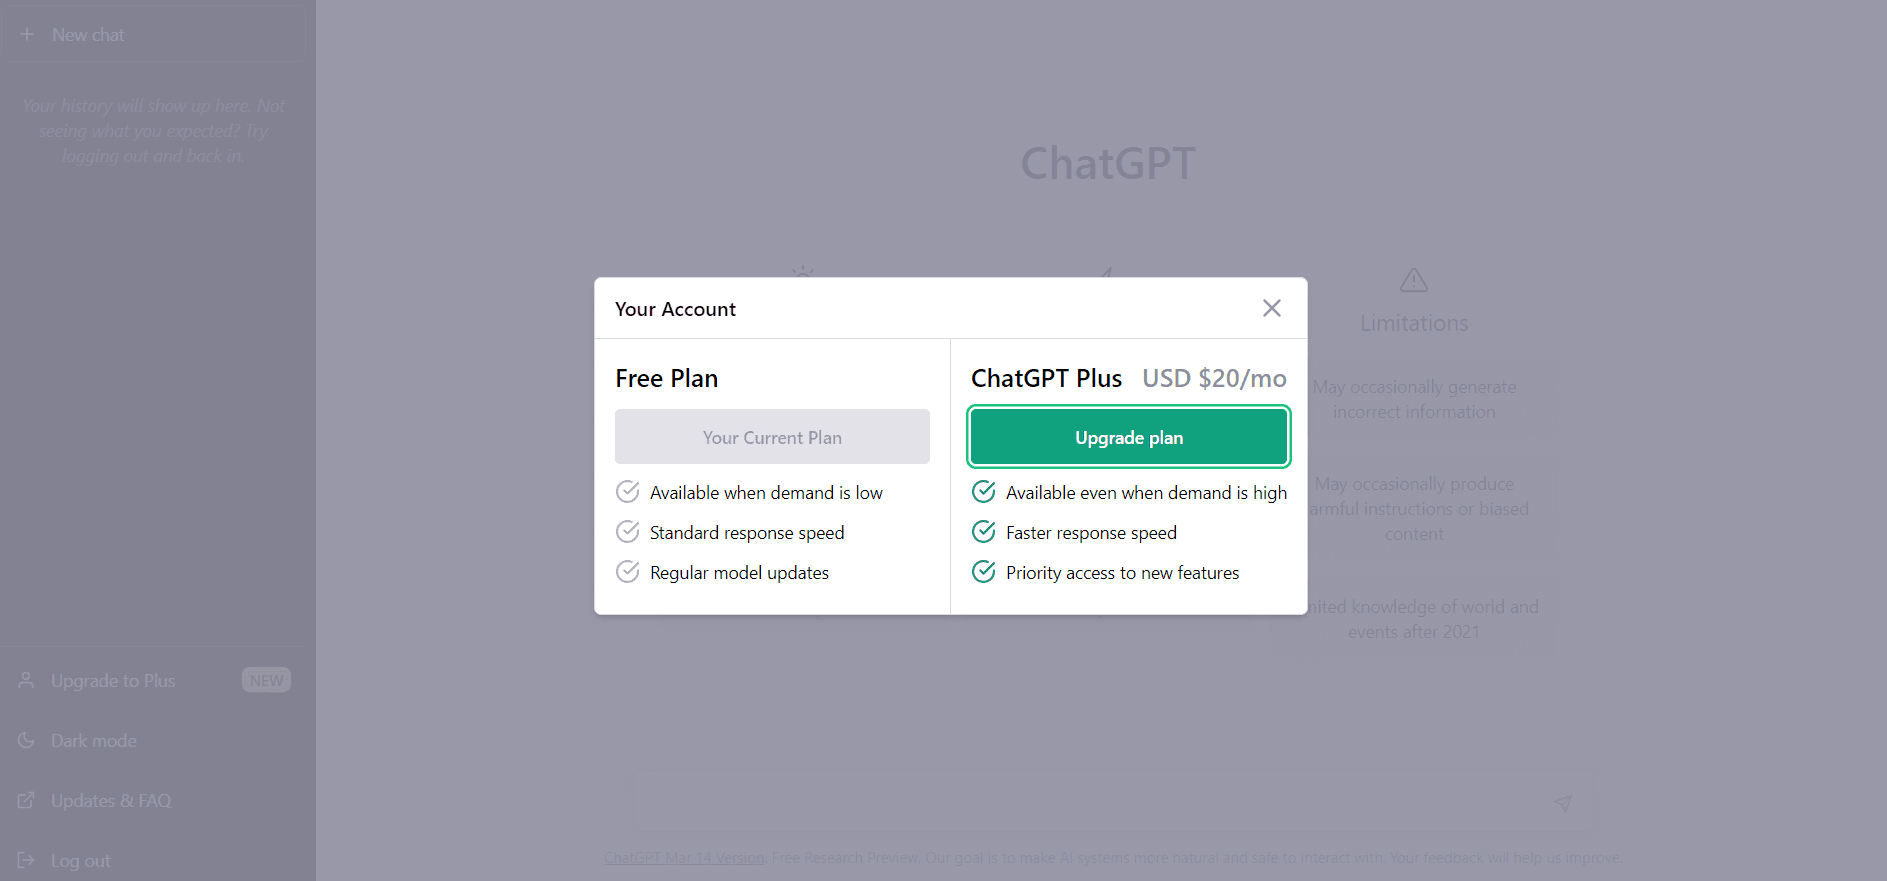
Image from ChatGPT
If you don’t want to pay the monthly subscription fee, you can also join the API waitlist for GPT-4. Once you get access to the API, you can follow this guide to use it in Python.
It’s okay if you don’t currently have access to GPT-4.
You can still follow this tutorial with the free version of ChatGPT that uses GPT-3.5 in the backend.
3 Ways to Automate Data Science Workflows with GPT-4 and Python
1. Data Visualization
When performing exploratory data analysis, generating a quick visualization in Python often helps me better understand the dataset.
Unfortunately, this task can become incredibly time-consuming - especially when you don’t know the right syntax to use to get the desired result.
I often find myself searching through Seaborn’s extensive documentation and using StackOverflow to generate a single Python plot.
Let’s see if ChatGPT can help solve this problem.
We will be using the Pima Indians Diabetes dataset in this section. You can download the dataset if you’d like to follow along with the results generated by ChatGPT.
After downloading the dataset, let’s load it into Python using the Pandas library and print the head of the dataframe:
import pandas as pd

df = pd.read_csv('diabetes.csv')
df.head()

There are nine variables in this dataset. One of them, “Outcome”, is the target variable that tells us whether a person will develop diabetes. The remaining are independent variables used to predict the outcome.
Okay! So I want to see which of these variables have an impact on whether a person will develop diabetes.
To achieve this, we can create a clustered bar chart to visualize the variable “Diabetes” across all the dependent variables in the dataset.
This is actually pretty easy to code out, but let’s start simple. We will move on to more complicated prompts as we progress through the article.
Data Visualization with GPT-3.5
Since I have a paid subscription to ChatGPT, the tool allows me to select the underlying model I’d like to use every time I access it.
I am going to select GPT-3.5:
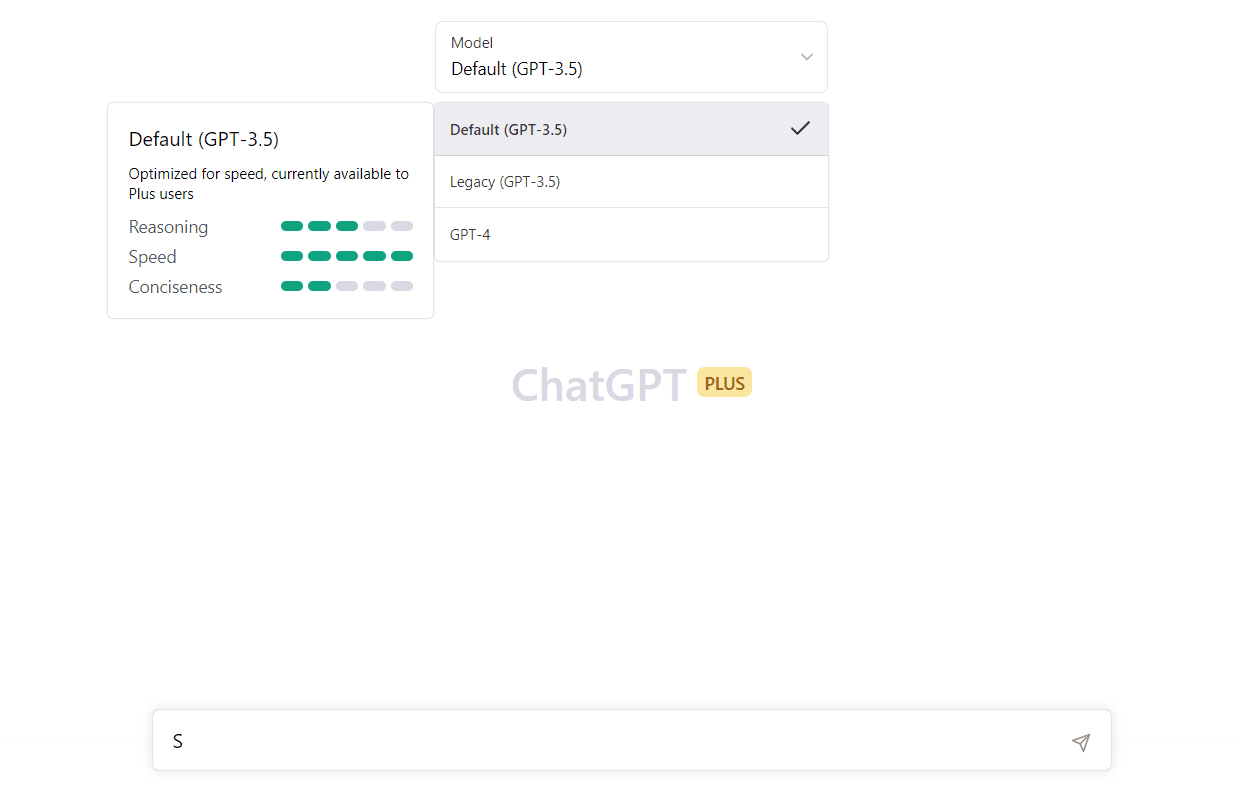
Image from ChatGPT Plus
If you don’t have a subscription, you can use the free version of ChatGPT since the chatbot uses GPT-3.5 by default.
Now, let’s type the following prompt to generate a visualization using the diabetes dataset:
I have a dataset with 8 independent variables and 1 dependent variable. The dependent variable, "Outcome", tells us whether a person will develop diabetes.
The independent variables, "Pregnancies", "Glucose", "BloodPressure", "SkinThickness", "Insulin", "BMI", "DiabetesPedigreeFunction", and "Age" are used to predict this outcome.
Can you generate Python code to visualize all these independent variables by outcome? The output should be one clustered bar chart that is colored by the "Outcome" variable. There should be 16 bars in total, 2 for each independent variable.
Here is the model’s response to the above prompt:
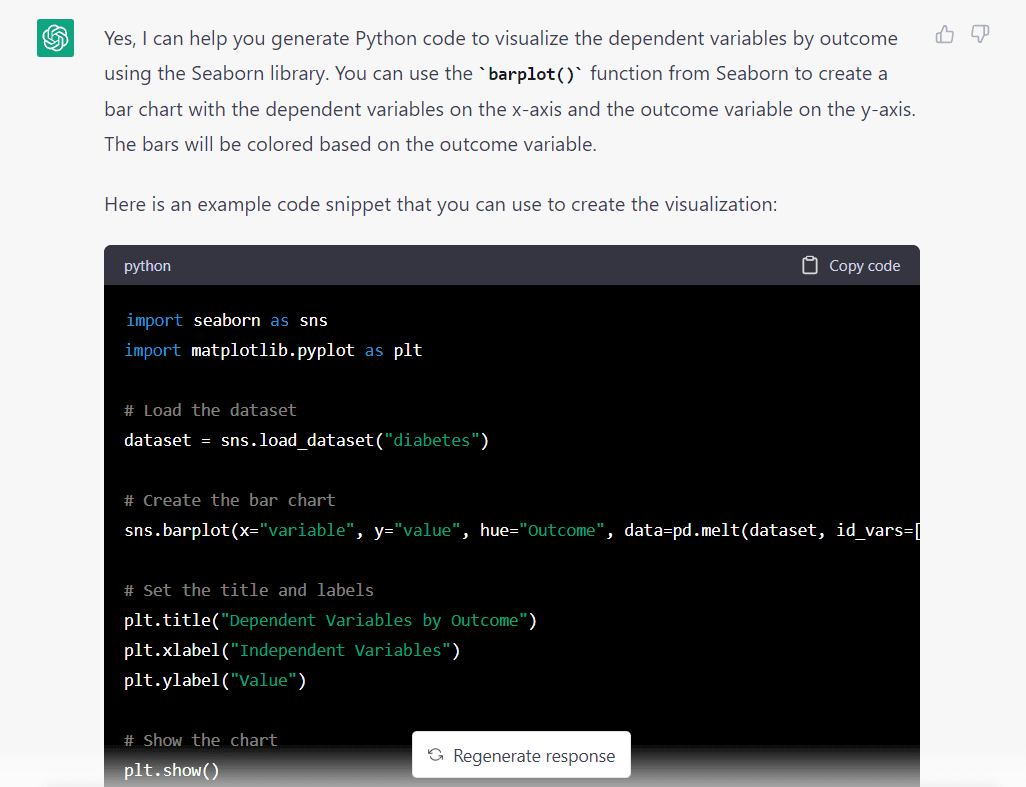
One thing that stands out immediately is that the model assumed we wanted to import a dataset from Seaborn. It probably made this assumption since we asked it to use the Seaborn library.
This isn’t a huge issue, we just need to change one line before running the codes.
Here’s the complete code snippet generated by GPT-3.5:
import seaborn as sns
import matplotlib.pyplot as plt

# Load the dataset
dataset = pd.read_csv("diabetes.csv")

# Create the bar chart
sns.barplot(
    x="variable",
    y="value",
    hue="Outcome",
    data=pd.melt(dataset, id_vars=["Outcome"]),
    ci=None,
)

# Set the title and labels
plt.title("Dependent Variables by Outcome")
plt.xlabel("Independent Variables")
plt.ylabel("Value")

# Show the chart
plt.show()
You can copy and paste this into your Python IDE.
Here is the outcome generated after running the above code:
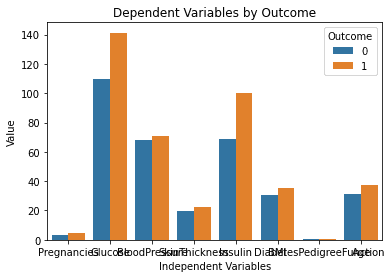
This chart looks perfect! It’s exactly how I envisioned it when typing the prompt into ChatGPT.
One issue that stands out, however, is that the text on this chart is overlapping. I am going to ask the model if it can help us fix this, by typing the following prompt:
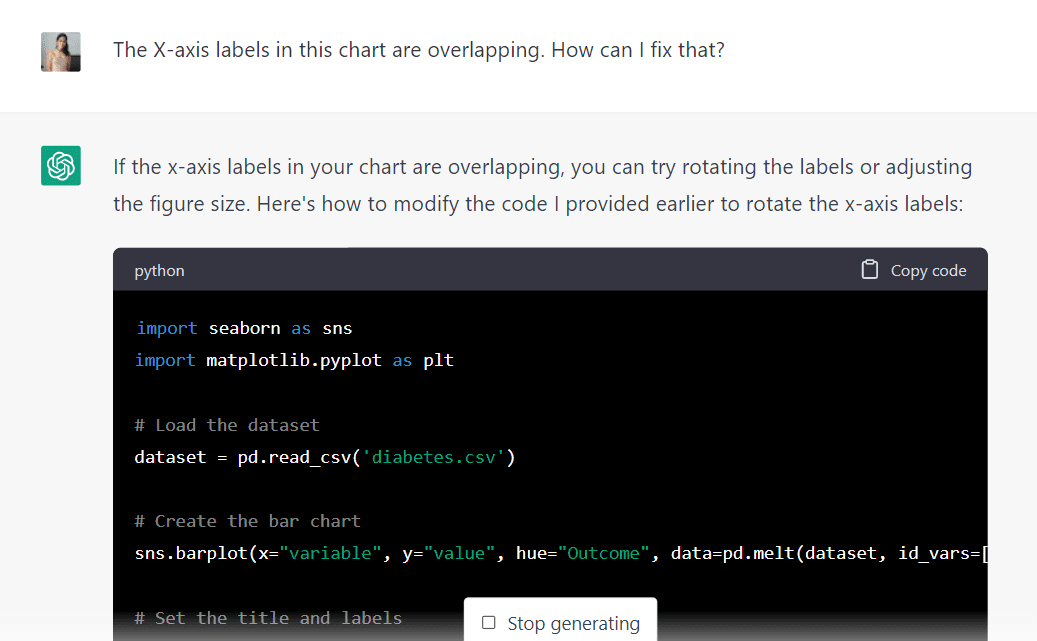
The algorithm explained that we could prevent this overlap by either rotating the chart labels or adjusting the figure size. It also generated new code to help us achieve this.
Let’s run this code to see if it gives us the desired results:
import seaborn as sns
import matplotlib.pyplot as plt

# Load the dataset
dataset = pd.read_csv("diabetes.csv")

# Create the bar chart
sns.barplot(
    x="variable",
    y="value",
    hue="Outcome",
    data=pd.melt(dataset, id_vars=["Outcome"]),
    ci=None,
)

# Set the title and labels
plt.title("Dependent Variables by Outcome")
plt.xlabel("Independent Variables")
plt.ylabel("Value")

# Rotate the x-axis labels by 45 degrees and set horizontal alignment to right
plt.xticks(rotation=45, ha="right")

# Show the chart
plt.show()
The above lines of code should generate the following output:
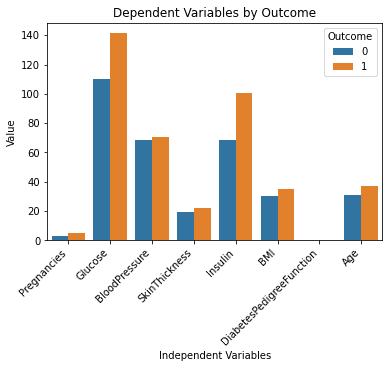
This looks great!
I understand the dataset a lot better now by simply looking at this chart. It appears as though people with higher glucose and insulin levels are more likely to develop diabetes.
Also, notice that the “DiabetesPedigreeFunction” variable doesn’t give us any information in this chart. This is because the feature is on a smaller scale (between 0 and 2.4). If you’d like to further experiment with ChatGPT, you can prompt it to generate multiple subplots within a single chart to solve this problem.
Data Visualization with GPT-4
Now, let’s feed the same prompts into GPT-4 to see if we get a different response. I am going to select the GPT-4 model within ChatGPT and type in the same prompt as before:
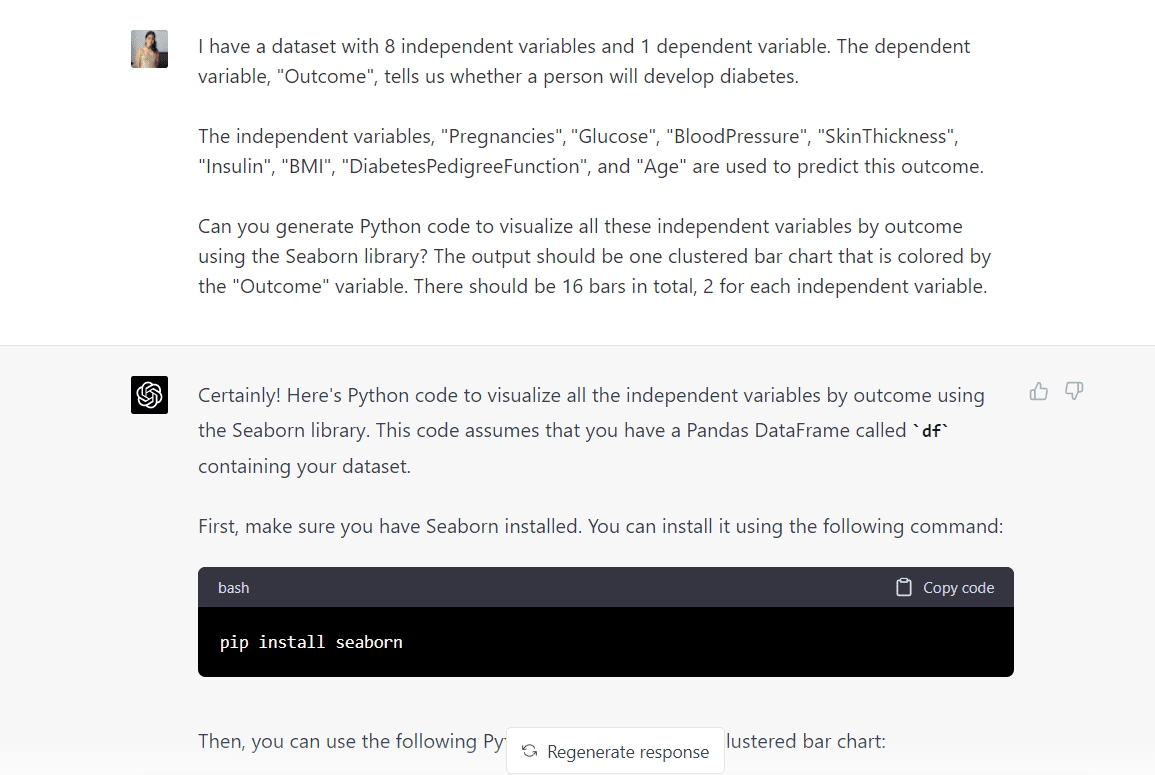
Notice how GPT-4 does not assume that we will be using a dataframe that is built into Seaborn.
It tells us that it will use a dataframe called “df” to build the visualization, which is an improvement from the response generated by GPT-3.5.
Here is the complete code generated by this algorithm:
import pandas as pd
import seaborn as sns
import matplotlib.pyplot as plt

# Assuming your DataFrame is called df
# First, you need to melt the DataFrame to make
# it suitable for creating a clustered bar chart
melted_df = pd.melt(
    df,
    id_vars=["Outcome"],
    var_name="Independent Variable",
    value_name="Value",
)

# Create the clustered bar chart
plt.figure(figsize=(12, 6))
sns.barplot(
    data=melted_df,
    x="Independent Variable",
    y="Value",
    hue="Outcome",
    ci=None,
)

# Customize the plot
plt.title("Independent Variables by Outcome")
plt.ylabel("Average Value")
plt.xlabel("Independent Variables")
plt.legend(title="Outcome", loc="upper right")

# Show the plot
plt.show()
The above code should generate the following plot:
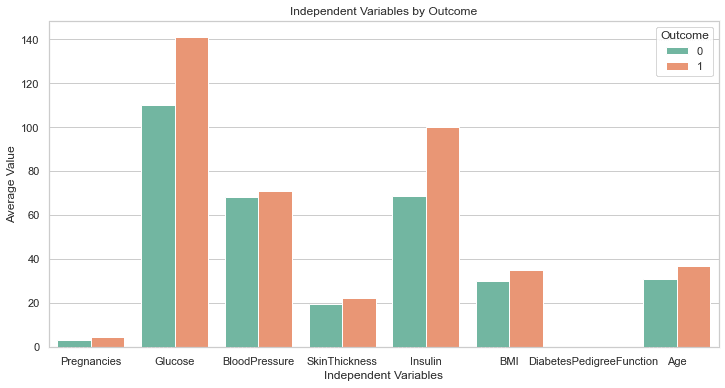
This is perfect!
Even though we didn’t ask it to, GPT-4 has included a line of code to increase the plot size. The labels on this chart are all clearly visible, so we don’t have to go back and amend the code as we did earlier.
This is a step above the response generated by GPT-3.5.
Overall, however, it appears as though GPT-3.5 and GPT-4 are both effective at generating code to perform tasks like data visualization and analysis.
It is important to note that since you cannot upload data into ChatGPT’s interface, you should provide the model with an accurate description of your dataset for optimum results.
2. Working with PDF Documents
While this isn’t a common data science use-case, I have had to extract text data from hundreds of PDF files to build a sentiment analysis model once. The data was unstructured, and I spent a lot of time extracting and preprocessing it.
I also often work with researchers who read and create content about current events taking place in specific industries. They need to stay on top of the news, parse through company reports, and read about potential trends in the industry.
Instead of reading 100 pages of a company’s report, isn’t it easier to simply extract words you are interested in and only read through sentences that contain those keywords?
Or if you’re interested in trends, you can create an automated workflow that showcases keyword growth over time instead of going through each report manually.
In this section, we will be using ChatGPT to analyze PDF files in Python. We will ask the chatbot to extract the contents of a PDF file and write it into a text file.
Again, this will be done using both GPT-3.5 and GPT-4 to see if there is a significant difference in the code generated.
Reading PDF Files with GPT-3.5
In this section, we will be analyzing a publicly available PDF document titled A Brief Introduction to Machine Learning for Engineers. Make sure to download this file if you’d like to code along to this section.
First, let’s ask the algorithm to generate Python code to extract data from this PDF document and save it to a text file:
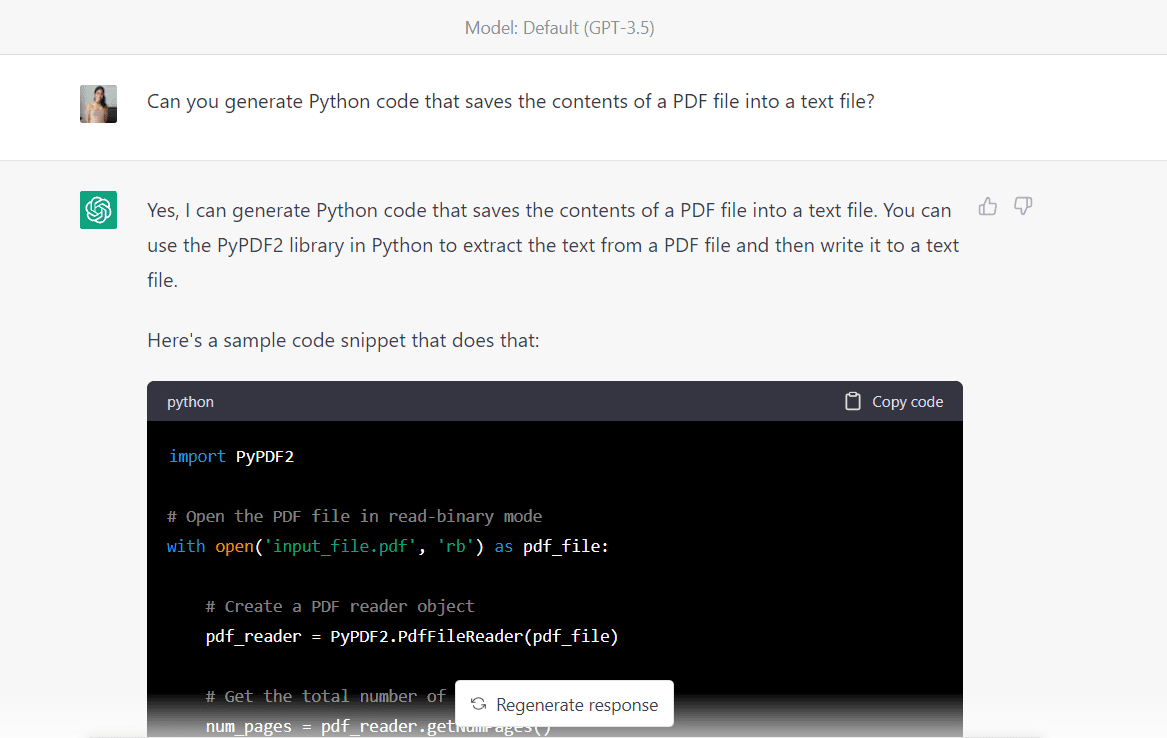
Here is the complete code provided by the algorithm:
import PyPDF2

# Open the PDF file in read-binary mode
with open("Intro_to_ML.pdf", "rb") as pdf_file:
    # Create a PDF reader object
    pdf_reader = PyPDF2.PdfFileReader(pdf_file)

    # Get the total number of pages in the PDF file
    num_pages = pdf_reader.getNumPages()

    # Create a new text file
    with open("output_file.txt", "w") as txt_file:
        # Loop through each page in the PDF file
        for page_num in range(num_pages):
            # Get the text from the current page
            page_text = pdf_reader.getPage(page_num).extractText()

            # Write the text to the text file
            txt_file.write(page_text)
(Note: Make sure to change the PDF file name to the one you saved before running this code.)
Unfortunately, after running the code generated by GPT-3.5, I encountered the following unicode error:

Let’s go back to GPT-3.5 and see if the model can fix this:
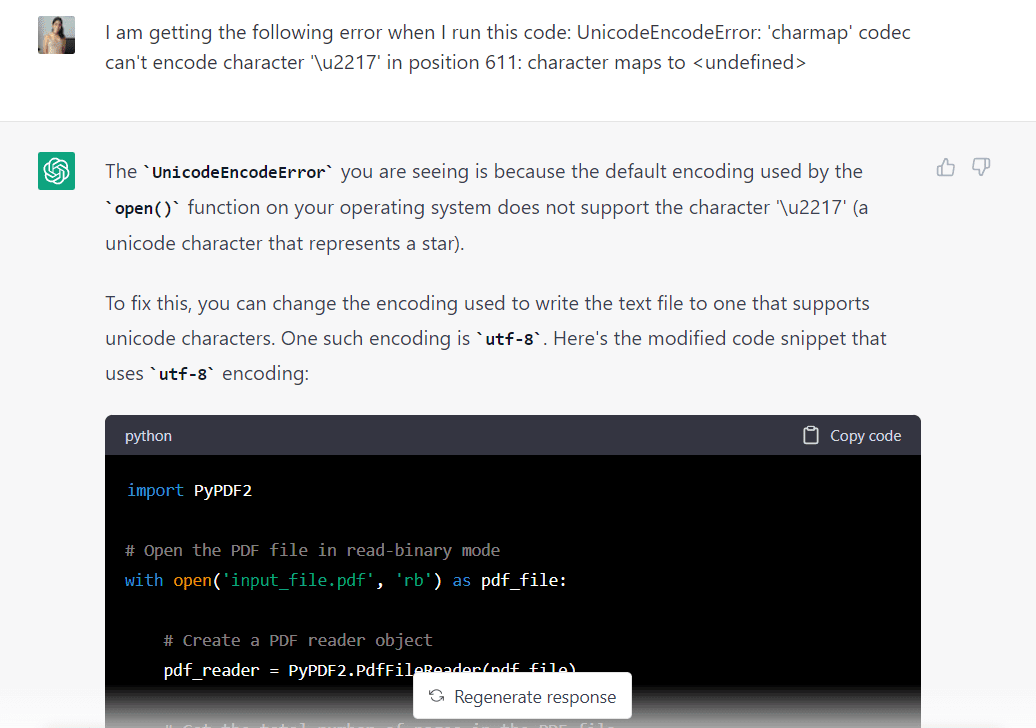
I pasted the error into ChatGPT, and the model responded that it could be fixed by changing the encoding used to “utf-8.” It also gave me some modified code that reflected this change:
import PyPDF2

# Open the PDF file in read-binary mode
with open("Intro_to_ML.pdf", "rb") as pdf_file:
    # Create a PDF reader object
    pdf_reader = PyPDF2.PdfFileReader(pdf_file)

    # Get the total number of pages in the PDF file
    num_pages = pdf_reader.getNumPages()

    # Create a new text file with utf-8 encoding
    with open("output_file.txt", "w", encoding="utf-8") as txt_file:
        # Loop through each page in the PDF file
        for page_num in range(num_pages):
            # Get the text from the current page
            page_text = pdf_reader.getPage(page_num).extractText()

            # Write the text to the text file
            txt_file.write(page_text)
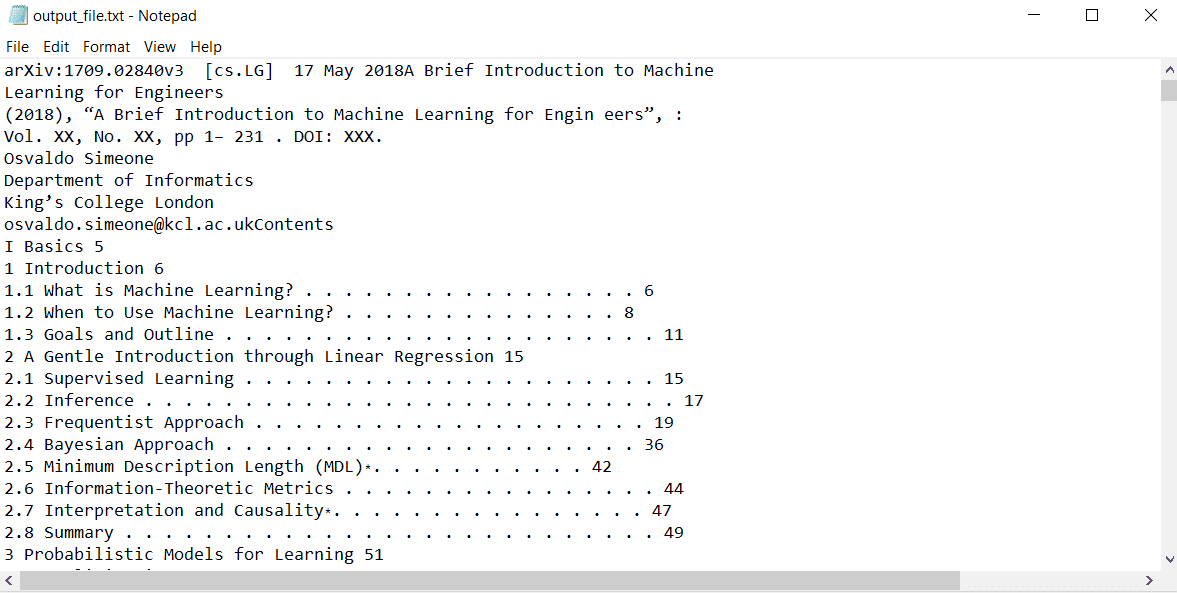
This code executed successfully and created a text file called “output_file.txt.” All the content in the PDF document have been written to the file:
Reading PDF Files with GPT-4
Now, I am going to paste the same prompt into GPT-4 to see what the model comes up with:
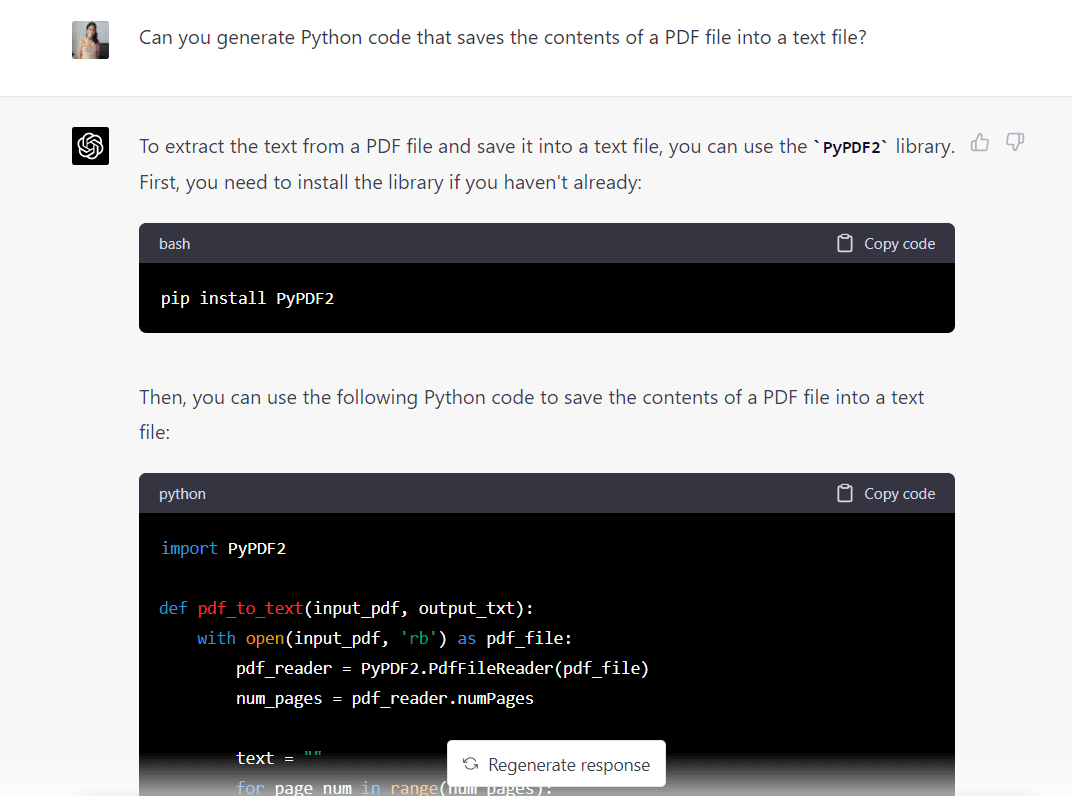
Here is the complete code generated by GPT-4:
import PyPDF2


def pdf_to_text(input_pdf, output_txt):
    with open(input_pdf, "rb") as pdf_file:
        pdf_reader = PyPDF2.PdfFileReader(pdf_file)
        num_pages = pdf_reader.numPages

        text = ""
        for page_num in range(num_pages):
            page = pdf_reader.getPage(page_num)
            text += page.extractText()
    with open(output_txt, "w", encoding="utf-8") as text_file:
        text_file.write(text)


input_pdf = "Intro_to_ML.pdf"
output_txt = "output_gpt4.txt"
pdf_to_text(input_pdf, output_txt)
Look at that!
Unlike GPT-3.5, GPT-4 has already specified that “utf-8” encoding should be used to open the text file. We don’t need to go back and amend the code like we did previously.
The code provided by GPT-4 should execute successfully, and you should see the contents of the PDF document in the text file that was created.
There are many other techniques you can use to automate PDF documents with Python. If you’d like to explore this further, here are some other prompts you can type into ChatGPT:
- Can you write Python code to merge two PDF files?
- How can I count the occurrences of a specific word or phrase in a PDF document with Python?
- Can you write Python code to extract tables from PDFs and write them in Excel?
I suggest trying some of these during your free time - you’d be surprised at how quickly GPT-4 can help you accomplish menial tasks that usually take hours to perform.
3. Sending Automated Emails
I spend hours of my workweek reading and responding to emails. Not only is this time-consuming, but it can also be incredibly stressful to stay on top of emails when you are chasing tight deadlines.
And although you can’t get ChatGPT to write all your emails for you (I wish), you can still use it to write programs that send scheduled emails at a specific time or modify a single email template that can be sent out to multiple people.
In this section, we will get GPT-3.5 and GPT-4 to help us write a Python script to send automated emails.
Sending Automated Emails with GPT-3.5
First, let’s type the following prompt to generate codes to send an automated email:
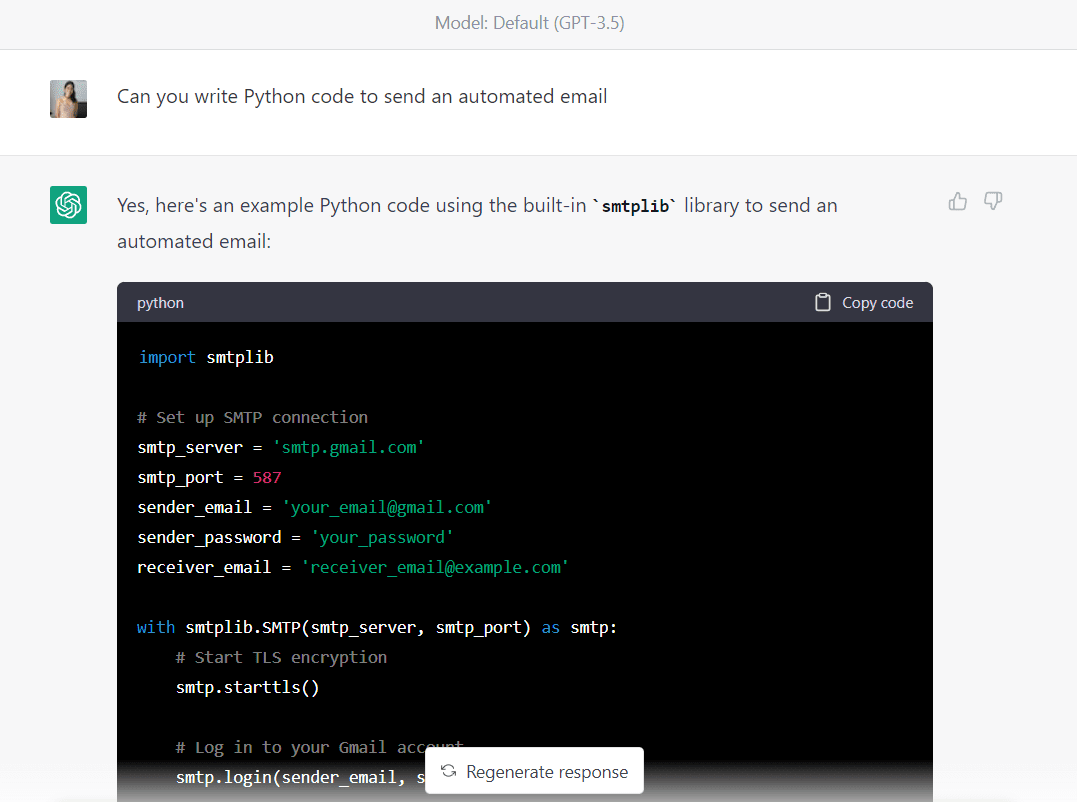
Here is the complete code generated by GPT-3.5 (Make sure to change the email addresses and password before running this code):
import smtplib

# Set up SMTP connection
smtp_server = "smtp.gmail.com"
smtp_port = 587
sender_email = "your_email@gmail.com"
sender_password = "your_password"
receiver_email = "receiver_email@example.com"

with smtplib.SMTP(smtp_server, smtp_port) as smtp:
    # Start TLS encryption
    smtp.starttls()

    # Log in to your Gmail account
    smtp.login(sender_email, sender_password)

    # Compose your email message
    subject = "Automated email"
    body = "Hello,\n\nThis is an automated email sent from Python."
    message = f"Subject: {subject}\n\n{body}"

    # Send the email
    smtp.sendmail(sender_email, receiver_email, message)
Unfortunately, this code did not execute successfully for me. It generated the following error:
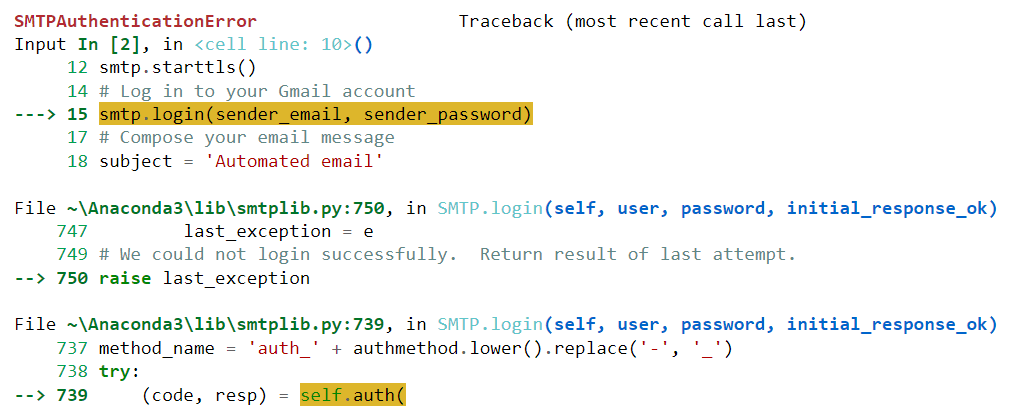
Let’s paste this error into ChatGPT and see if the model can help us solve it:
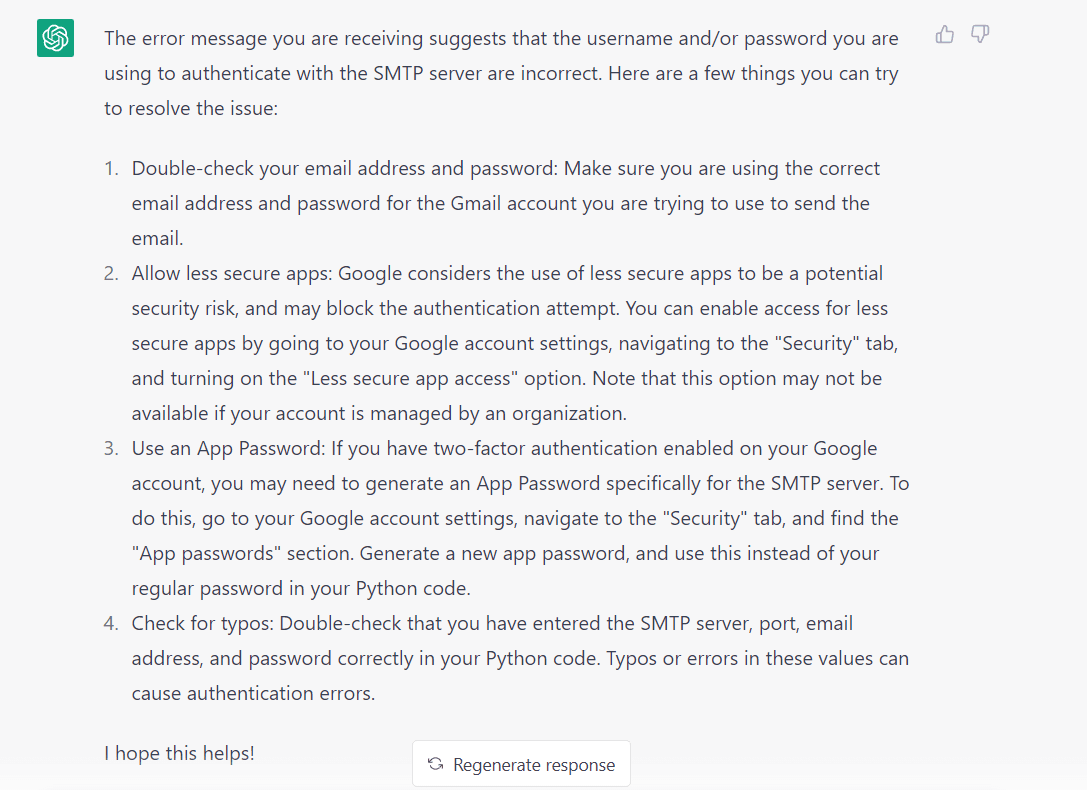
Okay, so the algorithm pointed out a few reasons as to why we might be running into this error.
I know for a fact that my login credentials and email addresses were valid, and that there were no typos in the code. So these reasons can be ruled out.
GPT-3.5 also suggests that allowing less secure apps might solve this problem.
If you try this, however, you will not find an option in your Google account to allow access to less secure apps.
This is because Google no longer lets users allow less secure apps due to security concerns.
Finally, GPT-3.5 also mentions that an app password should be generated if two-factor authentication was enabled.
I don’t have two-factor authentication enabled, so I’m going to (temporarily) give up on this model and see if GPT-4 has a solution.
Sending Automated Emails with GPT-4
Okay, so if you type the same prompt into GPT-4, you will find that the algorithm generates code that is very similar to what GPT-3.5 gave us. This will cause the same error that we ran into previously.
Let’s see if GPT-4 can help us fix this error:
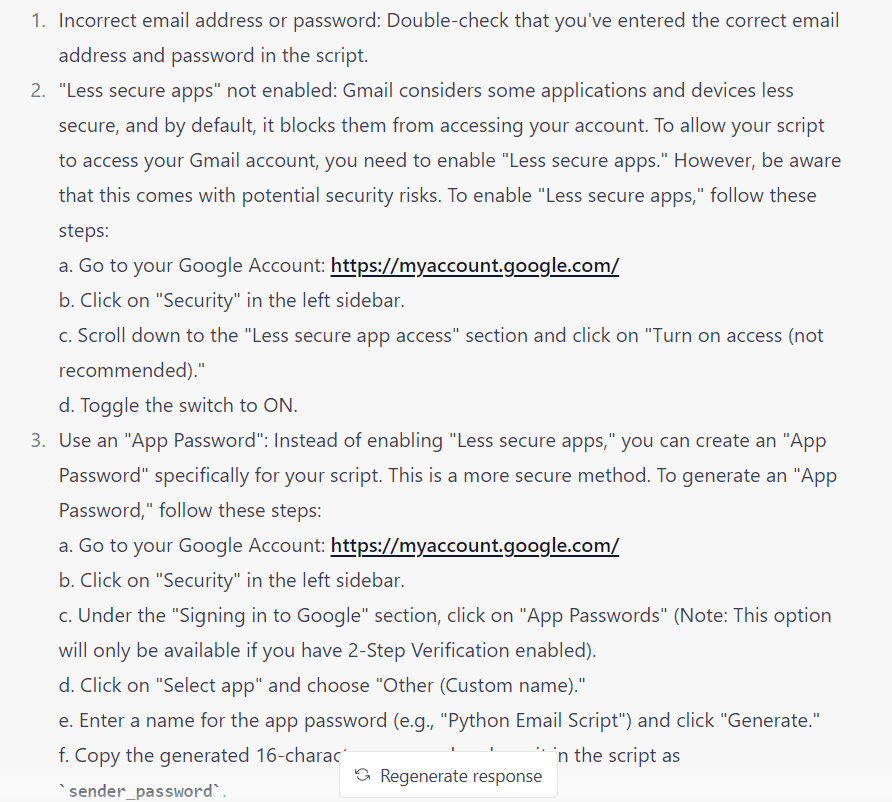
GPT-4’s suggestions are very similar to what we saw previously.
However, this time, it gives us a step-by-step breakdown of how to accomplish each step.
GPT-4 also suggests creating an app password, so let’s give it a try.
First, visit your Google Account, navigate to “Security”, and enable two-factor authentication. Then, in the same section, you should see an option that says “App Passwords.”
Click on it and the following screen will appear:
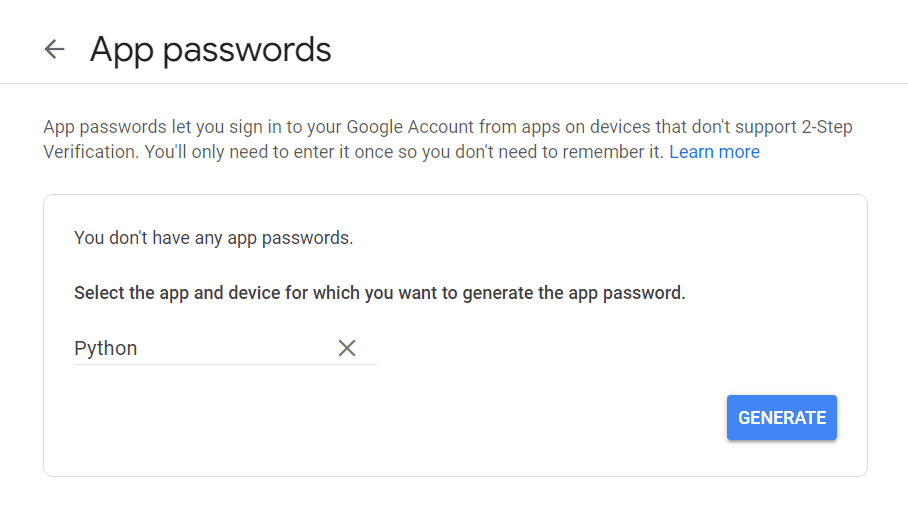
You can enter any name you like, and click on “Generate.”
A new app password will appear.
Replace your existing password in the Python code with this app password and run the code again:
import smtplib

# Set up SMTP connection
smtp_server = "smtp.gmail.com"
smtp_port = 587
sender_email = "your_email@gmail.com"
sender_password = "YOUR_APP_PASSWORD"
receiver_email = "receiver_email@example.com"

with smtplib.SMTP(smtp_server, smtp_port) as smtp:
    # Start TLS encryption
    smtp.starttls()

    # Log in to your Gmail account
    smtp.login(sender_email, sender_password)

    # Compose your email message
    subject = "Automated email"
    body = "Hello,\n\nThis is an automated email sent from Python."
    message = f"Subject: {subject}\n\n{body}"

    # Send the email
    smtp.sendmail(sender_email, receiver_email, message)
It should run successfully this time, and your recipient will receive an email that looks like this:
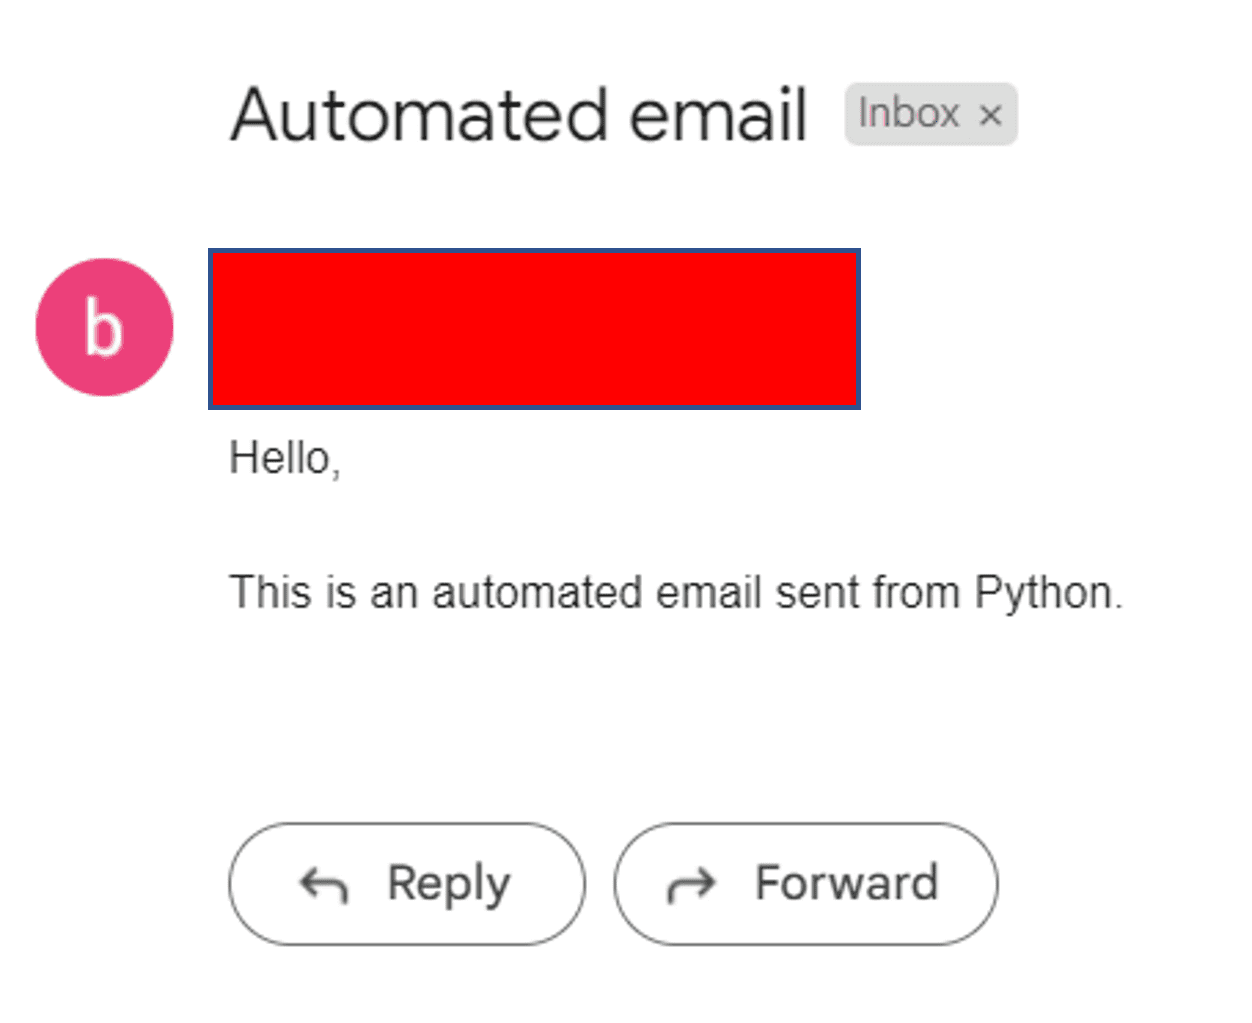
Perfect!
Thanks to ChatGPT, we have successfully sent out an automated email with Python.
If you’d like to take this a step further, I suggest generating prompts that allow you to:
- Send bulk emails to multiple recipients at the same time
- Send scheduled emails to a predefined list of email addresses
- Send recipients a customized email that is tailored to their age, gender, and location.
Natassha Selvaraj is a self-taught data scientist with a passion for writing. You can connect with her on LinkedIn.
